April 27, 2016

The Best Part of My Year {Did you grab THIS freebie?}

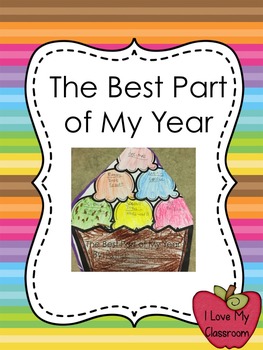
Here's another project that my students completed last week.  We spent time writing down our favorite units of the year and creating an ice cream sundae to stick it all together.  I wanted to have these sundaes up to show parents for Open House, there's something special about all their favorite memories in one place.


These 6 scoops of ice cream became our favorites of Writing, Reading, Math, Social Studies, Science, and an Art Project.  The kids first wrote, then colored their sundaes, then cut it out before gluing onto their favorite color of construction paper.  I love how they personalized their ice cream - they really are their favorites.  :)

FREEBIE: The Best Part of My Year {Ice Cream Sundae Open H

Head over to TPT to download it.  It's the same thing from last year, just sharing again in case you didn't know me back then.  :)  Hope this helps someone!  

April 26, 2016

Figurative Language Flowers


Has your room went Figurative Language CRAZY??!  It's like spring hit and the kids are picking up on Figurative Language everywhere.  I LOVE it!  To celebrate spring, or maybe just Figurative Language, or maybe just another Open House project... we made a Figurative Language bulletin board.  The top has our CA poppies (which each petal has examples of Hyperbole, Alliteration, Simile, and Personification), and then on the bottom the kids created their Literal Idiom Art.  Oh - that just capitalized on their silliness these days.  The flowers are just a big template that I give my students that they trace onto orange construction paper and cut out (I use file folders to create the template).  After writing, they fold the petals forward to make them POP from the wall.  The idiom art came from The Peanut Gallery.  I glue them 4 per piece of construction paper and then cut the green edge to form grass that also pops off the wall.  It's the little things people...  

What are you doing to have fun with Figurative Language these days? Hope this helped someone!  

April 25, 2016

Reflective Science Project


I love having my kids think about everything we've learned this year.  For Social Studies that means we create our California Pillows and write everything we've learned on them.  For Math, we tackle a clock and use the hour and minute hands to show our favorites, for Reading we make the kites... I've never created an art project for Science though.  

Please still be my friend with that confession.

I don't know why, but it didn't happen in past years.  This year I gave them a piece of blue construction paper, paper plate, and a sharpie and told them to get to work...

They traced the paper plate onto the blue paper to form a circle.  They took green and white paint to create Earth from a space view. We used Qtips to paint with since I still don't have a sink in the portable and tempera with paint brushes just makes a gigantic mess  we only had 2 colors..  No cutting was allowed though until after it dried.  Then on the paper plate we divided it into 3 sections for the 3 areas of science we have learned this year.  The kids brainstormed what we have learned (and I wrote it on the board).  They came up with more stuff after I snapped a picture... but that covered the basics.

Once their paint was dry, they cut out the circles, and we stapled them on top of the paper plates to hide their writing.  Super easy but I love the impact that it has brought into our classroom.  There's something special about reflecting on what we learned this year.  Another project done for Open House!

Hope this helps someone!

April 24, 2016

Earth Day Agamographs


I don't know why Earth Day always ends up being a week of art projects, but I absolutely love it.  Art with Jenny K. created the base of this Agamograph.  I did this last year too, and what a project it is.  The kids ohh and ahh over it, it really makes an impact.  Then Open House always falls soon after, and when parents walk in, they always do the moon walk to look from both angles.  It's that cool.   

Here's how I tweaked it to work even easier in my classroom.  

The picture itself is on 2 pages.  Last year I had a copy budget issue - I didn't have enough paper or money by this time of year to have a 2 page project, so I shrunk it down to be 2 pages per sheet.  The sheets are lined up horizontally on the paper, and then I added specific steps below it so I didn't have to hover over all 32 students at exactly the same moment...

1.  Color (I put this near her color code.)
2.  Cut top and bottom of sheets to form a long, thin colored sheet, then cut the middle of the sheet (where it was extra because of the 2 pages per sheet).
3. Glue the 2 pieces together.
4.  Fold like a fan.
5.  Glue onto the paper.  


I love how it turns out.  How did you celebrate Earth Day?  

April 23, 2016

Book Bite Book Report Pictures


I wanted to share some of the most aww-inspiring Book Bites Book Report Projects from this year's batch.  So creative!  Once again, my class used the Book Report pack from The Peanut Gallery.  The premise is that the kids have to come up with a type of meal that has "bites" to it.  Each bite has to have specific information - like setting, characters, plots, etc... and all writing is to be hidden underneath the bite.  Everything is explained in the project directions and it really is an easy print and go project.  Highly recommend it if you are looking for a creative book report.  


When I first discuss the project with my students I always use her student sample pictures (they are included in the packet)... but then I also pull out the 3D hamburger and taco that past students have given me to show off.  I also pulled up last year's images to show my kids (Yes, I show them my blog).  That's what really sparks the interest... "You mean so & so made that?"  I give the students 6 weeks to complete this project.  1 week to get their parent to sign off that they read the directions, 1 week to choose a book, 4 weeks to read the book, and 2 to work on the project.... That's just me though.  

Okay - pictures of this year's Book Buffet. 

\

This child used construction paper, but they used a donut box to showcase it.


This child used styrofoam with felt for their hamburger.


This breakfast was made out of foam.  I thought it clever to use a zip tie to keep all the pieces attached to the paper plate.  


Pizza is always a winner.  This was served in a pizza box and the clay was glazed to make it rock hard.  


This child used model magic to form pancakes and served it on a tray.  


An In and Out burger, drink, and fries is always a winner.  There was felt pieces to form the different layers.  


A birthday cake, complete with a candle and sprinkles.  :)  This child was creative and used velcro to attach the pieces together.  


This styrofoam cake's layers and filling were split to hide the writing.  Cakes are almost always served in a cake box.  

Super cute, right?!  Of course I had 24 more projects that also came in that also showed off my students' hard work.  Some used just construction paper, and that was just fine.  Very proud of them.  Hope this helps someone.  

April 11, 2016

Learning about Braille and Sign Language {Helen Keller, Louis Braille, Koko's Kitten}


The past month we have been working on Biographies in my classroom.  Before break we learned about Ben Franklin and last week we learned about Helen Keller.  The kids LOVE learning about Helen.  She was an incredible lady that conquered her difficulties by working really really hard.  It's because of her character that I choose to spend time learning about her in my classroom.  

First up - our main text last week was I am Helen Keller.  


It's a short book that is full of detail and fun facts.  I picked it up a few years ago through Scholastic when it was only $1. In class we read about 3 chapters a day and finish it up within a week.  Besides spiraling through our reading strategies, we also add in some more texts and activities...

The Miracle Worker on Youtube.  


I didn't have enough time to watch the entire movie of Helen Keller's story, but there are tons of clips available to use on Youtube.  We watched the clip of her going around the table, picking off her family's plate... and then also the clip where she finally understood that words have meanings - the water scene.  We also watched a short clip of the real Helen and Annie, how she would "read" Annie's lips as she was talking with her hand on her mouth.  


I think that showing the clips added to our class discussions and the kids were able to fully understand how difficult her life was.  

Louis Braille - OCR story

Louis Braille's short text is a history of how he came up with the braille alphabet in his teenage years.  The kids are always amazed that a teenager designed it by hard work and perseverance.


After we read about Louis Braille I pass out push pins and the kids get to work writing their names and short sentences by sitting on the carpet and making pin pricks into copy paper.  They have the Braille alphabet in front of them... usually they want more time.  Now, I teach 4th so I always give them a huge lecture about pushpin safety beforehand... and if for some reason they choose not to follow directions they have to immediately turn in their supplies and can't finish the activity.  


Another day we make Braille Names Using Split Peas (picture above).  I take these free Braille cells (from TPT), and the kids transfer over their name first using pencil, and then adding split peas on top.  They are the perfect size to do so.  

Koko's Kitten - OCR Story


Because this week is mainly learning about Helen Keller and the ways that she communicated, we also spend time learning about sign language.  There's a short story in OCR that talks about Koko's Kitten.  The kids always enjoy a good gorilla story and this is no different.  After reading, we also checked out Koko's website and also back to Youtube for a short sign language video (lots of options to choose from).  So many little videos to explore!  


All in all I love this week of learning - how everything ties together so perfectly.  Do you study alternative ways of communication?  My kids loved it!  I hope this helps someone.  

April 4, 2016

Social Studies Timelines


We are wrapping up the year!  I can't believe it how fast time has flown.  I wanted to share our Social Studies timelines.  I LOVE how they came out.


First up, we took a 12 x 18 piece of white paper, and folded it in half (hot dog), and placed it on our desks with the fold at the top.  We took a ruler (it was a scary moment), and starting with one end we measured and marked every 3 inches to form 6 sections.  We drew 5 lines to separate them out.  


The kids started to decorate the outside of their flip flaps:
Section 1: Regions
2: Native American
3: Explorers
4: Missions
5: Gold Rush
6: Statehood


After all the illustrating was done, we got to work writing inside.  They cut only the top portion, and wrote directly under the flap about that specific area.  Here's what I made them write about:
Regions: Favorite region and why
Native American: Interesting facts they learned
Explorer: Favorite explorer and why
Mission: Interesting facts they learned
Gold Rush: Interesting facts they learned
Statehood: Why they love living in CA


Hope this helps someone.

April 2, 2016

Remembering our Easter Party

Well Spring Break is almost over... so I've been remember what we 
did that Thursday before Easter. 

It was a magical day in the classroom.  

It was also exhausting, but oh so fun!  


My shopping list for the day included:
*40 Easter Eggs
*3 bags of Jelly Beans
*Toothpicks and Paper Plates
*Peeps
*Paper Bags (Lunch size)
*Skittles


 One of our first activities was making our Easter baskets.  Yes, they are 4th graders but they still love art projects.  It's a matter of taking a bag, cutting 2 slits for the handles, and stuffing the rest of the bag inside.  I filled them with little treats later on in the day... 
 Let me show you a picture from years ago:


We also had an Easter Egg Hunt outside.  


To make it educational, I tucked ten Reading Strategies inside the eggs using my Reading Exit Slips.  I shrunk them down to 4 sheets per page (16 little task cards), and then we folded them to easily fit inside the eggs.  

Reading Strategy Exit Slips

The kids had a scavenger hunt outside and had to find the 10 different strategies and then relate them to our classroom read aloud.  :)  I'm so sneaky...  

Candy, candy, candy... So much candy!  

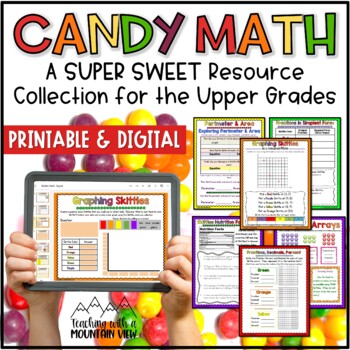
Skittles Math Printables for the Upper Grades

In Math, we used Skittles to review operations and fractions using Teaching with a Mountain View's Skittle Math.


We met with our 1st grade Reading Buddies and made Stem Towers using Jelly Beans and toothpicks.  Their creations were pretty impressive.   


Then we used Peeps to go through a little science experiment observing what happens in 4 types of liquids.  Here's the PDF with what my students filled out for both of these activities:  


All in all it was a fun day!