
July 29, 2016
Prepping for the New Year
This last week I've been talking to many first year teachers, veteran teachers, and teachers that have changed job positions... we all have something in common... feeling overwhelmed! I wanted to go through my mental process with anyone that wants to listen, how I set up my classroom and get ready for the new year. I'm sure there are many other ways to do it, but this is what helps me...
1. Think about your morning routine: Kids come in and what do they do? For me it's the same every morning. They come in, get organized (put away backpacks and lunches), get out homework to be checked, and start their morning work. Which means I need to make sure to put out my lunch tub, have a turn in basket, have homework folders ready, and figure out what kind of morning work I want them to do.
2. Then I think about the subjects themselves. For each subject I want to have a spot on the bulletin board to hang what we are learning in the subject either through student work, anchor charts, etc. What do the kids need when we are learning that subject? What do I need? My students take notes so we need composition books (because I dislike dealing with spiral notebooks falling apart mid lesson). I need anchor chart paper... Where are they going to keep their textbooks? Will they fit in their desk? Maybe they need tubs, or do you want to store some of their notebooks? Does your school have cubbies? Here's what I do:
Math - kids have notebooks and textbook at their seat, need whiteboards...
Reading - kids have notebook, I'll pass out the novel when it's time.
Writing - kids have notebook and need a classwork folder to keep everything organized. I have sheet protectors inside the classwork folder so we can add some papers later on.
Social Studies - kids have textbook, I'll keep notebook, will pass out during lesson.
Science - kids have textbook, I'll keep notebook, will pass out during lessons.
Pencil Box - kids need to have a pencil, colors (markers, crayons, highlighters?), glue, scissors, pens?
3. Let's talk desks... Every student needs to be able to see the board. I know that's a no brainer. :) Can I get to their desk easily? Is there going to be a traffic jam anywhere? I personally like having only a couple of rows in my classroom. The less heads between me and the back row students the better. At this point I get to talking with last year's teachers... I get their advice where to seat students. Who needs to sit in the front due to hardship or behavior? Who wears glasses?
4. Classroom library: How many books do I have? How am I going to organize them? Sort by AR Level, genre, alphabetical order? Most of the teachers I know sort by AR so we can see from a distance where the kids are grabbing books from. For years I've used plastic shoeboxes to sort the books, but this year I took all the books out and placed them on the shelf (like a real library). Every book is still labeled with the levels, and each shelf is designated. Just going for a new look that is easier to dust. :)
5. Think about the ground... My students play games on the ground, go into centers, silent read, partner read... it really doesn't work space wise to have us sit all together. That's just me though. I have carpet squares that make it a little softer. What do you need?
6. When I get my keys, I usually walk in and survey the room. There are students desks, a front cart, a teacher's desk, some bookshelves, a table, file cabinets, and some computers on a cart. My storage are some rolling carts, and I've added another bookshelf and some storage drawers. I place the furniture that is going to be on the perimeter of the room first, setting the area up as I imagine our routines. Lunch bucket by the door, a ball bucket by the door, teacher storage by my desk. Then I move to the front of the room, place my cart (since the projector only has one place it can be set up), and get those student desks in their right spots.
7. After this point I start getting my walls ready. I like having one board per subject, a big area for student work, and an information wall (behavior, calendar, jobs, etc). This year I learned the beauty of a staple gun to hang fabric. I always figure out placement first by using pushpins, then it's an easy staple/stretch to get it up. It's okay to not have anything on your boards to begin the year. There are certain things I know I will use, so I do get those things up before school starts - but that's only if I have time, it's not high priority.
8. Think about your classroom management... do you have a clip chart, or a color flip system? Make room for it. Need to do team points? Put out some jars.
9. If I have helpers come in (aka my children), I get them busy passing out the notebooks, folders, pencil boxes, and textbooks. Other jobs they do are to "clean" my rainy day game box... which allows them to get out of my hair when I'm running around the classroom. :)
10. One of my last room projects before moving onto lessons are to take out those school supplies. I want the kids to be independent when they need paper, community supplies, sharpen their pencil, get a staple, etc. When I first started teaching I only had one station, the past few years I've had two paper stations (front and back of the room)... it means less traffic jams.
11. Then I move onto lessons... If you are brand new to a grade level, please ask others for help. It's okay to not know everything. Our district has pacing guides for most of the subjects that point us in the right direction. I pull out everything I will need the first week of school and I get a plan together for the first TWO weeks of school. I've found that I am so tired by that first Friday that I can't think straight to plan out the next week, so I plan early. When am I going to start that subject? How am I going to teach that routine? Take it slow and know that there is a good chance you will need to bump back some plans. Add in teamwork building games and activities. I'll do an entire post about my first week plans next week.
12. The first week of school there is also the parent Back to School Night (at least for us). Figure out what you want in your packet. Make up a powerpoint of the important stuff. For me, that is the most nervous night of the year. Just keeping it real. I'm fine talking to kids, but to a bunch of adult strangers... well my knees go weak and I tend to talk super fast.
It's okay to feel overwhelmed. Everyone does, even if they don't admit it. The more years I do this whole back to school sprint, the more I realize that it does get easier even if your work load doesn't get lighter. Same stuff to prep, but every year you learn a couple more time savers that will help you in the future. I'm sure I forgot some things, and when I'm really done with my classroom I'll post some pictures too. I hope you have a great school year. If you need any specific help and encouragement, feel free to email me at ilovemyclassroom@ymail.com. :)
July 28, 2016
Making Grammar Fun using Scissors
Today I wanted to show what I've made for my new batch of kids! Last year I realized how much my big kids (fourth graders) still loved cutting out shape books. Paper would turn into snowmen, apples, pumpkins, etc. throughout the year. It motivated them to complete a brainstorm when it was deemed "fun" and by fun it meant a shape. So, this summer when I actually had time, I created these 9 shape books for my kiddos. Each batch of books has 10 pages that can be stapled together.
Why grammar? Well every week my class works on Mentor Sentences. Every week we are labeling the words in our interactive notebook, and every week we are discussing the parts of speech. So I wanted to let them create brainstorm booklets that can let them show what they know.
My plan is to have the kids use one shape per month August to April:
September - Apples
October - Pumpkins
November - Acorns
December - Winter Hats
January - Snowmen
February - Mittens
March - Butterflies
April - Clouds
May - Flowers
Each booklet has a shape/page dedicated to nouns, pronouns, verbs, adjectives, adverbs, prepositions, conjunctions, interjections, a cover page, and a blank one that could be used for anything I can dream up. Just wanted to share what I've been getting ready, here's the link if you think they might work in your classroom too.
How have you been prepping for school?
July 27, 2016
Back to School Freebies {Did you grab these?}
I hope that you are having a relaxing summer. This morning I woke up at 4:30 am with my head in full to do list mode. The back to school nightmares dreams haven't started yet, but I'm sure they are just around the corner.
Today I wanted to share some quick links to FREEBIES that have made my classroom run extra smooth the past couple of years.
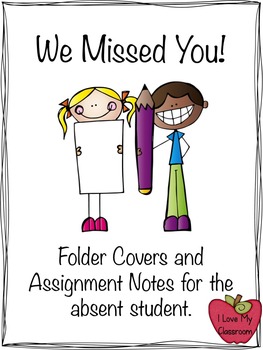
I printed these covers 4 per page, laminated, and stapled onto plastic folders (plastic since they are easily washable for sick kids). They stay in a bucket, along with the included checklist. When a student is absent, their neighbor grabs a folder and checklist, and throughout the day they update the folder with the materials the absent student will need when they return to school (papers that need to go home, interactive notebook papers to be glued, homework, etc).
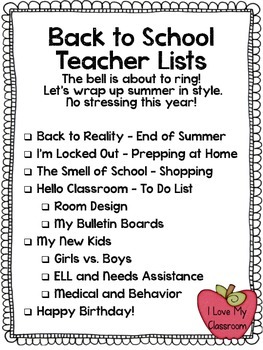
This is my "get ready for school" teacher info. packet that I jot down notes and make plans for an easy transition back to school.
This contains more those Student papers that make life easier for me... Rainbow Edit, Whole Class Writing, and Monthly Grammar. :)
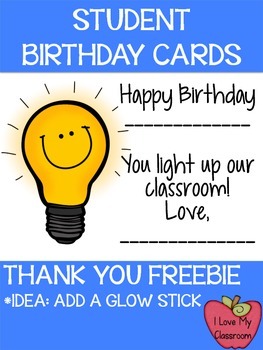
I print a stack of these cards on colored card stock, and on student birthdays I give students a glow stick, card, and homework pass.
These notes keep my reading instruction moving nice and smooth. Last year I passed out file folders for every novel, and the kids added these sheets to keep everything organized.

This is by far the best classroom decision I made. No more tickets, just a simple chart on the board that we add student classroom numbers, and still have the raffle on Fridays.
Hope this helps!
July 25, 2016
40 Book Challenge {Freebie}
The other day I was going through my computer files for Back to School and was reminded about the Book Whisperer... Remember this book?
 |
| Click the text to head to Amazon to purchase. |
My students have kept a running list of books they have read for the past couple of years, but this coming year I wanted them to get little awards to help with motivation. It's amazing how little recognition notes go a long way to motivate my reluctant learners.
The attached freebie is really simple set up, but I hope that it helps someone. There's the challenge sign, a reading sheet for student tracking, and the recognition notes that range from 5 books to 50 (for those students that pass the challenge).
It's over on Google Docs. Hope you have a great day!
July 22, 2016
Back to School Teacher Clothes Giveaway! {LulaRoe Party Time}
It's a Back to School Sale - Teacher Clothes Edition! My BFF is a LulaRoe consultant and we are teaming up to bring you a party of epicness! I'm passing all my hostess presents on to lucky winners in the form of giveaways.
A little background...
Kia stared selling LulaRoe this past December, and I was hooked from the beginning. I basically wear it almost everyday. It's comfortable, affordable, and looks professional. What are my favorites in their line of clothing?
Irmas and Leggings
Irmas are a longer shirt that completely cover your rump. I don't have to be self conscious. Best part - you go down 2 sizes for the perfect fit. :) Leggings are called Butter Leggings because they are so soft, like you want to keep feeling your legs (but you can't because it would look weird).
Classic Tees
These are perfect to wear with pants, capris, and jeans. I love that they are a little longer in length, so you don't have to worry about your shirt lifting up when you are erasing the board, hanging up papers on the bulletin board, or when you are leaning over to help a student.
Perfect Tees
This is my new favorite - I love that these are roomy around the belly and are so form flattering. I can wear these with leggings, pants, or skirts.
Maxi Skirts and Azure Skirts
Both kinds of skirts have that stretchy top that makes them super comfy.
There are so many other styles, but I haven't tried them yet, like these Amelia dresses. Absolutely darling and perfect for a busy day!
Here are some perfect, comfortable looks for the classroom:
Skirts, tops, and leggings...
LulaRoe is famous for their choices of patterns.
Get ready for this weekend's FB party sale - Go and follow her Facebook group so you are prepared... Everything starts bright and early (PST time) on Saturday morning.
July 20, 2016
Color those California State Symbols!
I absolutely love the addition of art projects in my classroom. Everything has a purpose though... practice following directions, a tie in to our unit, something that motivates kids to do their best. I'm a California teacher through and through, and learning about our California State Symbols is a big deal in my fourth grade classroom. I wanted to show you this coloring book I made for my class that we will work through during the school year. My plan is to have them color one symbol per month August through April, to be ready to put the books together for Open House in May. There are facts that are also included on each paper for reference.
I know not everyone teaches in California, but I want to highly encourage you to use your own state symbols as Fun Facts for your students. They are so interested in these little odd pieces of information and to find out the backstory how these symbols came to be important. :)
If you are a California teacher and want to see my coloring book up close, here's the link to it over on TPT. I hope it helps someone!
July 18, 2016
I LOVE my Silhouette!
For the past few years I've been trying to justify getting a Silhouette machine. This summer I had the opportunity to raise money just by filling out health surveys and doing some preventative care things through my insurance. It's a perk. The money comes in a form of a gift card, and I knew I wanted to spend a chunk of it on getting myself a machine. I bought the bundle through Amazon that came with the machine and the vinyl kit. It also came with a one month subscription to the design store - which meant I had a shopping spree of $25 I could spend on templates (most templates are $1).
I wanted to show you the projects I've done so far with the machine. These are just for the classroom...
I picked up this CA template and stuck it onto my Target Dollar Spot clip board. I tend to walk around the room with a clipboard, making informal notes, and I was impressed with how thick these clipboards are. LOVE how it came out!
I've shared this one on here before, but this is actually the KG Always a Good Time font that I glued onto those wood banner pieces from the Dollar Spot. The plan is to put these up on the bulletin boards to label the sections (and take down my paper labels).
This banner I made using the KG A Little Swag font and black card stock. I laminated the letters, then attached to black ribbon. It's going up on my Social Studies board above our map of California.
This is a template I found on the site - I stretched this to be an 8in. circle. My plan is to put this up on the whiteboard with the date, reminders, and homework.
These are more templates I found. I printed them 2 per piece of cardstock (5 inches wide). I made a total of eight of them. I have these picture holders at school (they look like a paper clip turned upside down) that I can set on desks to help with motivation.
I wanted to redo my birthday board... bright paper with these little month labels on top. They are ready for me to write the kids names... or add their pictures on top.
I found a font over on the site that's called PN Toy Time. LOVE how chunky it is. They also had this template for Instagram. I want to add a picture bulletin board on one of my cabinet doors. :) The Homework and Essential Questions will reside on my whiteboard. I chose to put them on a white background, I'm hoping it will blend into the board.
Another template I picked up was a set of twelve different arrows. I printed them out in 4 colors of card stock, and they are now in a bag, ready to add to anchor charts, bulletin boards, whiteboard reminders, etc.
For name tags this coming year I decided to print see through names on white card stock, then I laminated them. I printed out my class list (as of this moment). I know that things may change, but the majority of them should remain the same. A little packing tape will hold them in place on their desks.
These apple (removable) stickers were another Dollar Spot find for just a buck. I was trying out my hand with using vinyl... I almost went crazy. The plan is to put these on my file cabinets to label the different drawers. We'll see what happens when I can actually get in the classroom.
Hope you have a great day!
July 14, 2016
Highlighter Comprehension {Freebie}
Another summer project complete!
This last school year I expanded my use of highlighters in the classroom. I've always used different colored markers and pencils to do Rainbow Editing, and for taking notes, but usually I only give my students one single highlighter. We use it constantly though - during math, during reading, highlighting topic sentences, etc.... This upcoming year I wanted to bring in different colored highlighters to use on a daily basis, to check comprehension, and to make sure the kids are looking carefully at their work.
The kids always love to use them... I personally think they feel like they are in college when they do... and they really take good care of them. It's a big discussion at the beginning of the year. Bumping from a single highlighter per student to six is an investment though. A big portion of my budget, but it will be worth it. It makes things easy to grade, and I can check comprehension as I walk around the room.
I made these reminders for my own class - you can see them above. It's all in Black and White, so you can print and then add whatever highlighter colors you own, or you can make multiple copies if you want to highlight one area on a sheet for students to focus on. That's my plan for the Reading Strategies (why I didn't laminate that one). These will reside in a stack on my front cart, and I can add the specific sheet to the board when it's time for guided and independent work.
Check it out on Google Drive. :) I hope it helps.
Hope you have had a wonderful day!
Subscribe to:
Posts (Atom)


