Image Map
Showing posts with label Diorama. Show all posts

October 27, 2015

Ecosystem Dioramas


We've been working on ecosystems in my classroom.  LOVE the energy that the students have when they are learning about the different places.  Every year I have them create a diorama to "showcase" their special choice.  This year I decided to make it a formal project, and added clip art to help them with their thinking.


They were first allowed to choose an ecosystem from 4 choices (Ocean, Arctic, Forest, and Rainforest).  I gave them a piece of construction paper that had been precut and they decorated their background.  I put some options on the board as ideas, but being the copy cheapskate that I am, I didn't print them off for them.  :)


I did print out the specific ecosystem animal and grid sheets so they could focus on details for their dioramas.  The sheets are filled with animals on the top, and the grid on the bottom portion.  


Students filled in the grid and then glued it onto the back of their diorama.  They had to identify producers, consumers, prey, predator, living, and nonliving parts of the ecosystem.  It was then easy for me to use the included rubric to give a grade - did they really understand the concepts?


I loved all the unique ecosystems that they created.  I also loved that I didn't get a headache, and that the project didn't take forever to accomplish.  :)  Little things people!  
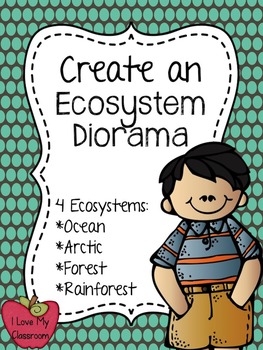
Create an Ecosystem Diorama {Forest, Ocean, Rainforest, an

Check it out!  Hope you had a great day!

February 19, 2015

Gold Rush File Folder Dioramas

We wrapped up our Gold Rush Unit before the end of the trimester, and the kids created file folder dioramas.  They were huge, but made the perfect size to get all the details inside. 


Basically how we created them were the same as when we usually make the smaller versions.  Here are my pictures from a past post.


Step 1: Lay horizontal


Step 2: Fold the right top corner down (Yes, you want that extra flap for the mountains.)


Step 3: Open it back up, and fold the left top corner down.


Step 4:  Open it up and see the gigantic X.


Step 5:  Cut one little fold of the X.


Step 6: Gently fold the paper in to the center until you get to the fold.  Secure (tape or staple - glue will take forever to dry).


Step 7: Flip it around to have 2 mountains on the back.

I had my kids add details to the dioramas.  In the past I had my kids draw everything... which usually ends up taking a really long time... and I didn't have that kind of time to give them this year.  They were able to glue in a clip art miner, and some chose to use a Gold Rush Bingo board clip art as their details (after we played Bingo during workshop).  Since it was just a fun wrap up to the unit, my main objective was for them to identify through their diorama (and their Gold Rush Mining Journal) what life was life during the Gold Rush.
  

Love how they came out even if they were huge!  One pushpin was all that was needed to hold them up on the wall.  

Hope you had a great day!


October 26, 2014

Science Dioramas


In past years I always had the kids bring in a shoe box to make our Ecosystem Diorama.  It was always a rush to find enough empty containers to make the project.  We would paint the setting, the room would stink for days, and it would take a long time to complete.  This year I didn't have that kind of time, so I used construction paper.


My 8th grade TA is a past student of mine.  He's responsible and I'm sure he appreciated prepping the paper for this project.  :)  At least he is too polite to tell me differently.

He put a kleenex box on a piece of 9 x 12 white construction paper and made a dot on the 4 corners where the box touched the paper.  Then he made slits in the paper  - a little cut from the corner to the dot.  


Then we handed the paper out to the students.  They folded the paper up to create a frame.  It was at this point that they were able to decide if they wanted a land (forest) ecosystem, or an ocean one.  They colored in the background with their crayons (no paint this year).  


Then they came over to myself and my TA to staple up the edges.  Just a quick staple in the four corners.  

We have been using these free workbooks that I received, and inside there was 2 food webs, an ocean and a forest scene.  


They cut out the pictures and labels and glued them into their dioramas.  Then the kids took a piece of paper and identified producers, prey, predators, herbivores, carnivores, and omnivores.  They glued it onto the back of their ecosystem boxes.  


It was nice turning a big project into something that was less smelly and took less time (since this year we are constantly running out of it).   


Hope you have a great day!


May 23, 2012

Paper Diorama


My dear wonderful coworker walked into my classroom the other day and announced this very simple, paper folding diorama.  In 12 years of teaching I have never seen this come together.  Now, I know this will be a yearly thing.


How to make a Paper Diorama - Now here's the steps:

 Step 1: Lay paper horizontal in front of you.
 Step 2: Fold down right corner to make a flat bottom.
 Step 3: Open it up and repeat on the left side.
 Step 4: Open it up and see the X - the top part of the X should be the small little folds (compared to the lower portion of the X).
 Step 5: Turn the paper so the little part is on the bottom.
 Step 6: Cut the left little fold just up to the intersection.
 Step 7: Gently pull the middle part of cut X to the left and have 
it overlap the paper until you get to the fold.  Tape, staple, or glue it into place.
Step 8: Flip it around so you have "mountains" in the background.


Here's an example of my student's Gold Mining Camp.  With their folds, it turned out to be tiny little mountains at the very top. 

Have fun paper folding!  I didn't get a headache from this project!

Sincerely,