Image Map
Showing posts with label Art. Show all posts

June 9, 2021

USA Paper Pillows - End of Year Project


One of the projects we did in the countdown to summer were USA paper pillows. I learned about this idea years ago from Teaching in Room 6.  She would have her kids make pillows about the 13 colonies.  Back in those days I taught 4th grade, so would have the kids draw the outline of California (since that's what our SS was all about), decorate it, cut it out, staple most of it shut, and stuff it with the left over paper before the final staple. 

I stopped doing that project when moving to 5th... don't know why. I think because other projects started taking over. This year I needed to go simple with projects that the kids could do at home.  I was reminded about it when Timehop popped up with my old 4th grade Open House pictures.  Seeing the California pillows hanging from the ceiling, I was reminded of how easy it was.  

When I was in 5th grade my elementary school used to have all the 5th graders head to the gym, where we had a huge USA state test.  Big paper on the lunch tables where we each had to draw the USA outline, and then fill in all the states and capitals.  So I decided to combine the ideas to make the pillows. 

It was fun.  It took a good 30 minutes, easily could have taken more.  Kids online and in class were both able to do it at the same time. 

I had the kids get 2 pieces of copy paper.  Then I showed them an outline of the USA, did not have them try to free draw it - posting a picture in our TEAMS conversation for the kids at home, and leaving under the document camera for the kids in class... 

Here are the student directions:

1. Draw the outline of the USA on copy paper or construction paper. Make it big to take up the whole paper. 

2. Write our units in the middle of the map and decorate with little pictures. You can use color.

3. Put your map outline on top of another paper and bubble cut both papers out. One cut for both papers. Do not try and cut the lines perfectly. 

4. Tape or staple the 2 papers together, leaving one end open. 
(This year I gave in class students a long piece of tape, and they just used their scissors to cut little pieces - they couldn't share a stapler.)

5. Scrunch up the scraps of paper, fill the pillow, and finish closing. 

Then being almost 6th graders they tried to use the pillows to take a nap... silly kids.  :)  

This project is great as a review.  Choose a shape that has significance and have them review what they have learned on by writing notes on top. 

Hope it helps,

March 25, 2021

Is it Spring Break Yet? Egg-citing Fun for Next Week

This year vacations have been much appreciated.  A chance to put down that extra load of crazy and just relax.  But we still have a week to go until blessed Spring Break.

Don't get me wrong, I absolutely love my kiddos.  They make my day, every single day.  I feel like I need that disclaimer in this post.

Next week I'm making it a review week, and a week to have some fun.  I need fun.  They need fun. I'm taking a week off of major grading and giving them Kindness Homework instead.  It's a win - win. Especially since it's also progress report time... Kindness to their families, kindness to friends, and our classmates.  We will brainstorm things each day they can do.  


I am going to tackle an egg hunt for in person next week.  Not a huge deal since they will each grab only one egg outside on the grass near our line. Inside each egg is a review ELA task card.  Just printed it a little small and tucked it inside the eggs.

During class, they will take turns opening up their one egg, going up to the webcam, and presenting it to the kids at home.  Then I'll jump on my camera to give instructions as to how to review with each question.  In class and at home kids will respond over in our group channels so they can show off their work to their classmates.  Group A (Monday's questions) are all about fiction strategies - so we will use our novel to respond to questions about plot, character development, setting, viewpoint, theme, context clues, inferences, etc.., and Group B (Tuesday's questions) are all about non-fiction, so we will use our SS  textbooks as resources to review cause and effect, compare and contrast, problem and solution, etc.  

Keep it simple... but also have fun.

Now Thursday I want to have a fun day... well, mainly fun.  


As for a craft - I LOVE this Bunny Craft from Teach Starter.  The kids use Zentangle designs to personalize it.  We haven't done much art this year since the kids haven't had access to many printers or coming to school for pick up, but now that 2/3 of them are able to get it from their desk to bring home... well we are tackling it. 


It's super easy to just print and go.  I need easy.  You can also google Teach Starter Funky Easter Bunny Craft and a lot of designs pop up to give ideas to the kids.  Usually I have them do their own thing, and then if they get super stuck they can take a peek.  

I'm also focusing on ways that the kids can GLOW this week.  I always give out an egg to the kids, have for years, and this year decided to choose Glow in the Dark eggs as the treat.


I found Glow Eggs over on Amazon.  They just need to be put in strong light for 3-5 minutes and then they will glow for up to an hour. Focusing on showing kindness to others, preserving when things get hard (aka review), and their own unique characteristics.  

Here's what I wrote on my note...


Hope you had a great day!  

January 15, 2017

Snowflake Similes


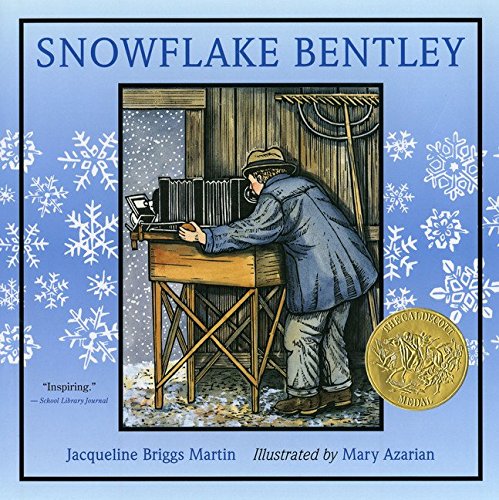
Snowflake Similes are one of my favorite winter activities.  This past week we read Snowflake Bentley, and did numerous activities with the book.


For the similes themselves, I have a half sheet template that we first brainstorm and then they create their own.  

Snowflakes are as unique as...

Snowflakes are as fragile as...

Snowflakes are as light as...

Here's the template if you need it.

After glueing on their template, the kids get to take a coffee filter and make their own snowflakes.  It's always art after the writing... Some years I have had the foam snowflakes (think Dollar Spot), but this year we resorted to the filters.  They really do make them unique.  We started fractions in math, so were able to practice that a bit as we were folding the circles getting ready to cut.  

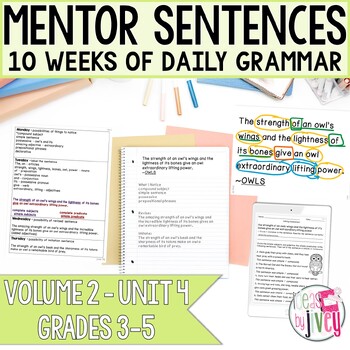
NONFICTION Mentor Sentences: Vol 2, Fourth 10 Weeks (Grades 3-5)

I also love Mentor Sentences and recently realized that Jivey has Snowflake Bentley in her Volume 2 Unit 4 product.  I love that my read aloud could also be used for our mentor sentence.  

Stowflake Bentley The Official web site of Wilson A Bentley (1865-1931) " No two snowflakes are alike"

I wanted to direct you to the Snowflake Bentley website, where there is much more information, photos, his articles, interviews, gift shop, etc.  So much realia to share with our students. 

What do you do with the book?  Hope you have a great day!

January 11, 2017

Easy Star Goals


At the beginning of every trimester I like the kids to come up with new goals.  We hang them on the sides of our room from the ceiling using pipe cleaners and paper clips. Well it's not the beginning of the trimester, but it is halfway through the school year, so we made some New Year's resolutions to stay focused.  The students created the big stars themselves using construction paper, some patience, and a ruler.  After drawing the lines, we cut away the outside pieces to form the shape.  

Inside the star, the students had to write their name in the smallest section at the top, then had to think of 5 things they want to work on in the coming weeks.  I gave them some examples.  :)  

Did your students make new goals?  It's always nice to look ahead.     

December 12, 2016

Snowman Ornaments


Every year I like to have my class make something to give their parents for Christmas.  This year I saw a cute idea over on IG to have the kids use glass ornaments and fill them up with marshmallows to create snowmen. I changed it up a bit and they filled it with 2 cotton balls, then used black sharpie for the eyes and a smudge of orange paint for the nose.  It was super simple, pretty cheap, and the kids were so proud.  I will definitely do this again!


December 6, 2016

Blue Dog Art


I have 4 art docents for my class this year.  It is amazing having so many parents that want to come in and teach the kids about different artists.  Each lesson is about a specific artist, the parents come in, share about the artist, different examples of art, the techniques used, and then the kids create art inspired by a certain painting.

  This last month our art project was inspired by the Blue Dog.  I had never heard of Blue Dog paintings before... so teaching this teacher too.  
  

After learning the history of George Rodrigue, the class did a directed draw of the little blue dog.  Oh, they were so engaged.  Face (circle shape, nose - beaker shape, eyes, ears, mouth), shoulders and front legs, then back leg and belly.  They drew in pencil, traced in sharpie, then painted with blue paint.  


Then they were able to add a background of their choice using crayons.  Some did different colors, some did a certain setting.  But they all popped using the different mediums.  So proud of my kids, so thankful for parent volunteers that make art a priority.    

November 18, 2016

Meatballs, Author's PIE, and Ivan


The week before any holiday is always extra busy... and this year wasn't any different.  Wrapping up a novel, adding in a little PIE, and celebrating with my school buddies for a Friends-giving made this week a success.  


I love this simple recipe for crockpot meatballs.  It's super easy - literally just throw the ingredients into a crockpot, and let it cook on low for 4 hours.  The students didn't even realize they were cooking over in the corner of the room.  It was my addition to our Friends-giving lunch potluck.  A bag of original meatballs, and equal parts of chili sauce and grape jelly.  That's it.  


I also love to do this PIE activity with my kids right before Thanksgiving.  In past years I used 2 paper plates - which meant cutting it and then stapling.  This year I simplified it and just used one plate - the top was turned into a pie (their choice of filling and coloring in a crust), then the kids used sharpie to divide it into 4 pieces and writing Authors, P, I, E.  Behind each piece the kids had to write a definition and an example of each type.  Super easy, but it was a great assessment tool.  

As for real pie, we had that too - the kids brought in donations of pumpkin pie for our Thanksgiving feast.  I split it up and served it with whipped cream as we watched a short Thanksgiving movie.  I LOVE Thanksgiving in the classroom!


We also finished up reading Ivan before break, so we created Ivan using 2 shades of gray paper, and then wrote opinion paragraphs on his belly.  An art project always seems to make finishing a beloved novel a little easier.  Directions for this craft are over on one of my old posts.  :)  

Hope you had a great day!

October 31, 2016

Halloween Activities {Pumpkin Plants, Catapults, and Ghost Rockets}


Oh, Halloween... how I really don't like you...  Halloween on a Monday this year just about killed me.  It is already my least favorite holiday, but I try to still have fun in the classroom.  I've not into the whole scary thing, never have been, so in class I more focus on spiders, bats, owls, and pumpkins. 

early stages of sprouts

 We had a pumpkin that we were gifted from the school's Fall Festival, so this year I decided to cut the top off and dump in some dirt.  That's it - I didn't stir or anything, just stuck it outside on our portable's porch, and the kids took turns dumping their water bottles in it to water.  Within 10 days it sported a bunch of sprouts emerging from the top and a colorful array of mold on the outside.  We transferred it to a planter (since the bottom was rotting), and now it's a full on plant, and you can't tell it was once a pumpkin... but the kids know and tell all our visitors.  


In class for Halloween, I wanted to focus on STEM activities, and since I was having parent help I decided to go big.  I found an idea to make Ghost Rockets and quickly ordered the film canisters from Amazon (thank you Amazon Prime).  It was super easy - the kids added a little bit of corn starch to the canister, then filled it with a little bit of water, stirred it with a popsicle stick, added an Alkaseltzer tab, put the lid on, and then stepped back.  We did this station outside, and those canisters flew as high as our two story buildings.  There was good discussions about the pressure inside the canisters.  


An inside station was building catapults to launch different materials.  We watched a youtube video (there are plenty to choose from) to make a simple catapult.  At home for prep, my husband took our heavy kitchen scissors and cut notches in large popsicle sticks, then at school the kids took 8 small sticks and stacked them.  They took rubber bands to secure the large sticks with the small ones.  I added some measurement activities to the station, and taped some long tape measures to the ground so they could record their distances.  They tested out the pumpkin candies, giant fluff balls, candy corns, etc.  It was such a fun activity, and the kids were able to bring their own catapult home as a souvenir.  The kids were able to handle creating it themselves with some adult guidance, will definitely do this again.  


The last station was actually a game.  I couldn't find the eye ball ping pong balls, but that didn't stop the kids from having fun.  Each kid had their own spoon to place the handle in their mouth, and they needed to transfer as many of the ping pong balls as possible from bowl to bowl.  It became a competition.  When they were done, they had a chance to complete their spider web art projects.  It was a headache free day, and was fun too.  :)  

July 20, 2016

Color those California State Symbols!


I absolutely love the addition of art projects in my classroom.  Everything has a purpose though... practice following directions, a tie in to our unit, something that motivates kids to do their best.  I'm a California teacher through and through, and learning about our California State Symbols is a big deal in my fourth grade classroom.  I wanted to show you this coloring book I made for my class that we will work through during the school year.  My plan is to have them color one symbol per month August through April, to be ready to put the books together for Open House in May.  There are facts that are also included on each paper for reference.  

I know not everyone teaches in California, but I want to highly encourage you to use your own state symbols as Fun Facts for your students.  They are so interested in these little odd pieces of information and to find out the backstory how these symbols came to be important.  :)  

If you are a California teacher and want to see my coloring book up close, here's the link to it over on TPT.  I hope it helps someone!  

April 27, 2016

The Best Part of My Year {Did you grab THIS freebie?}

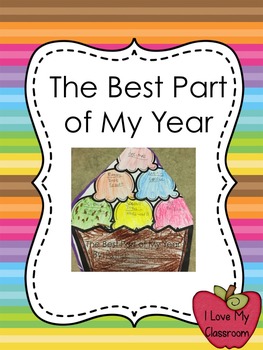
Here's another project that my students completed last week.  We spent time writing down our favorite units of the year and creating an ice cream sundae to stick it all together.  I wanted to have these sundaes up to show parents for Open House, there's something special about all their favorite memories in one place.


These 6 scoops of ice cream became our favorites of Writing, Reading, Math, Social Studies, Science, and an Art Project.  The kids first wrote, then colored their sundaes, then cut it out before gluing onto their favorite color of construction paper.  I love how they personalized their ice cream - they really are their favorites.  :)

FREEBIE: The Best Part of My Year {Ice Cream Sundae Open H

Head over to TPT to download it.  It's the same thing from last year, just sharing again in case you didn't know me back then.  :)  Hope this helps someone!  

April 26, 2016

Figurative Language Flowers


Has your room went Figurative Language CRAZY??!  It's like spring hit and the kids are picking up on Figurative Language everywhere.  I LOVE it!  To celebrate spring, or maybe just Figurative Language, or maybe just another Open House project... we made a Figurative Language bulletin board.  The top has our CA poppies (which each petal has examples of Hyperbole, Alliteration, Simile, and Personification), and then on the bottom the kids created their Literal Idiom Art.  Oh - that just capitalized on their silliness these days.  The flowers are just a big template that I give my students that they trace onto orange construction paper and cut out (I use file folders to create the template).  After writing, they fold the petals forward to make them POP from the wall.  The idiom art came from The Peanut Gallery.  I glue them 4 per piece of construction paper and then cut the green edge to form grass that also pops off the wall.  It's the little things people...  

What are you doing to have fun with Figurative Language these days? Hope this helped someone!  

April 25, 2016

Reflective Science Project


I love having my kids think about everything we've learned this year.  For Social Studies that means we create our California Pillows and write everything we've learned on them.  For Math, we tackle a clock and use the hour and minute hands to show our favorites, for Reading we make the kites... I've never created an art project for Science though.  

Please still be my friend with that confession.

I don't know why, but it didn't happen in past years.  This year I gave them a piece of blue construction paper, paper plate, and a sharpie and told them to get to work...

They traced the paper plate onto the blue paper to form a circle.  They took green and white paint to create Earth from a space view. We used Qtips to paint with since I still don't have a sink in the portable and tempera with paint brushes just makes a gigantic mess  we only had 2 colors..  No cutting was allowed though until after it dried.  Then on the paper plate we divided it into 3 sections for the 3 areas of science we have learned this year.  The kids brainstormed what we have learned (and I wrote it on the board).  They came up with more stuff after I snapped a picture... but that covered the basics.

Once their paint was dry, they cut out the circles, and we stapled them on top of the paper plates to hide their writing.  Super easy but I love the impact that it has brought into our classroom.  There's something special about reflecting on what we learned this year.  Another project done for Open House!

Hope this helps someone!

April 24, 2016

Earth Day Agamographs


I don't know why Earth Day always ends up being a week of art projects, but I absolutely love it.  Art with Jenny K. created the base of this Agamograph.  I did this last year too, and what a project it is.  The kids ohh and ahh over it, it really makes an impact.  Then Open House always falls soon after, and when parents walk in, they always do the moon walk to look from both angles.  It's that cool.   

Here's how I tweaked it to work even easier in my classroom.  

The picture itself is on 2 pages.  Last year I had a copy budget issue - I didn't have enough paper or money by this time of year to have a 2 page project, so I shrunk it down to be 2 pages per sheet.  The sheets are lined up horizontally on the paper, and then I added specific steps below it so I didn't have to hover over all 32 students at exactly the same moment...

1.  Color (I put this near her color code.)
2.  Cut top and bottom of sheets to form a long, thin colored sheet, then cut the middle of the sheet (where it was extra because of the 2 pages per sheet).
3. Glue the 2 pieces together.
4.  Fold like a fan.
5.  Glue onto the paper.  


I love how it turns out.  How did you celebrate Earth Day?  

April 4, 2016

Social Studies Timelines


We are wrapping up the year!  I can't believe it how fast time has flown.  I wanted to share our Social Studies timelines.  I LOVE how they came out.


First up, we took a 12 x 18 piece of white paper, and folded it in half (hot dog), and placed it on our desks with the fold at the top.  We took a ruler (it was a scary moment), and starting with one end we measured and marked every 3 inches to form 6 sections.  We drew 5 lines to separate them out.  


The kids started to decorate the outside of their flip flaps:
Section 1: Regions
2: Native American
3: Explorers
4: Missions
5: Gold Rush
6: Statehood


After all the illustrating was done, we got to work writing inside.  They cut only the top portion, and wrote directly under the flap about that specific area.  Here's what I made them write about:
Regions: Favorite region and why
Native American: Interesting facts they learned
Explorer: Favorite explorer and why
Mission: Interesting facts they learned
Gold Rush: Interesting facts they learned
Statehood: Why they love living in CA


Hope this helps someone.