Image Map

May 30, 2012

Camping Day!


For the last week of school my grade level does a bunch of fun "theme" days to celebrate.  We have had Game day, Movie day, Awards and Ice Cream day, Water day, and this year we started Camping day.

Camping day consisted of different activities in the classrooms that all revolve around nature and common things one might do while camping.  I say one might do because my version of camping would be in a hotel walking into nature for a day trip.  I don't like to "rough it".  

So here's what my class did.

*Solar Oven Smores
*Toilet Paper Bird Feeders
*Macaroni Picture Frames
*A Nature Activity Book (compliments from our town)
*Camp Sing-a-Long with the grade level outside
*Watching part of A Bug's Life movie, 
though for a minute in time I wished I owned Camp Rock.  

Solar Oven Smores

My class set these up pretty easy this morning.  I went into our local Round Table last weekend and begged the manager into donating 8 small pizza boxes to help my cause.  I then followed these directions from Family Fun to cut the box lid and get everything prepped for the kids.

At school this morning my students got into teams, and folded the lid up.  They taped foil to the flap, put foil on the base of the pizza box, and added a piece of black paper.  They then taped a sheet protector into the window of the box lid.  When they completed that portion, they used a BBQ skewer to prop the flap open.  

I think they turned out rather clever.  I was the one that stuck the graham crackers and marshmallows in the ovens, and moved them onto chairs set up outside.  All in all, it took about 75 minutes to make the 
marshmallow soft and squishy.

Then the kids formed an assembly line, took another graham cracker and chocolate chips outside where they created their smores sandwich.  
It was delicious!  
The Set Up - 4th graders can handle creating it.
All our smores in a row - being held down from the wind with packages of index cards.
 Toilet Paper Bird Feeders

My class also made toilet paper bird feeders today in our camping experience.  


 Step 1: Smear Cream Cheese onto Toilet Paper Rolls 
(I used cream cheese due to allergies and that I have learned 
Peanut Butter can cause bowel issues in birds.)


 Step 2: Roll it in bird seed (Yes, I used a big tub lid to catch the bird seed.)


 Step 3: Cut yarn, slip it through the middle of the tube, tie it, 
and stick it in a bag to take home.  

It was a crazy assembly line, but the kids had fun 
(and now birds are well fed tonight.)


Macaroni Picture Frames

This was another fun, simple project for the kids today.  Very easy to do, and cheap!  Pasta was $1, and I already had a huge box of popsicle sticks 
and old card stock paper.  


 They glued a frame onto the paper, it took a little bit to dry.  Then they chose their pasta to add to the frame.  Some kids got very elaborate with their designs.  The big thing I wanted them to do was to realize that there are so many everyday items they can use to create art.  


Thanks for visiting!

Sincerely,


Homemade Ice Cream In A Bag


Last year I did this recipe with my students.  I loved it so much that yesterday I did it again with my students and our 1st grade reading buddies.  

http://familyfun.go.com/recipes/homemade-ice-cream-in-a-bag-684806/


It really is an easy recipe, if the students actually listen to the directions.  All in all, at the end of the day I was covered with a mixture of rock salt, milk, and vanilla from helping them shake it up.  It was worth the mess!  


Here's how I set it up for a class of 32 (well actually 64).


I bought from the store:

2 gallons of milk (one per class)
Vanilla extract (16 tsp. worth)
Rock salt (2 boxes)
40 pounds of ice
Bag of sugar (64 tbsp. worth)
Quart sized bags for each student (64)
Gallon sized bags for each pair of students (4th grader and 1st grade buddy - 32 total)


  1. First I scooped 1 tbsp. of sugar into a quart sized bag for each student (no little fingers touched the sugar, I wanted to be able to use the rest of it for another project). 
  2. I poured the rock salt into a big bowl and the students measured out 6 tbsp. into a gallon sized bag.
  3. I poured 8 tsp. of vanilla into each gallon of milk, then shook the milk pretty hard to mix it up.  
  4. The students took their gallon bags outside and scooped ice about halfway into the bag. (They needed adult supervision on this, as some of them decided "halfway" was the entire bag.)
  5. I poured about a 1/2 cup of the milk/vanilla combo into each quart sized bag and made sure it was sealed.
  6. The students then took it and placed the sealed bag into their ice bag, sealed it up, and shook it for about 5 minutes.  Now, some students weren't listening and decided to pour the milk bag into the ice bag - so they had to start over.
  7. How we adapted for reading buddies was they placed both their bags into the same ice bag and took turns shaking it together, some even had fun tossing it back and forth.
  8. When it was a thick texture, like frozen yogurt, it was ready to eat.  We passed out spoons and the kids dove right in. 
This is something I would definitely recommend to another classroom.  Actually I have, and my grade level has tackled it alongside me.  It's messy, but the kids get a kick out of making it themselves.  Definitely try it!

Sincerely,


May 26, 2012

It's Going To Be a "Kool" Summer


This isn't my own idea, but I ran with it.  I originally got the idea from Classroom DIY, and then adapted it for my own gift for the kids.  This is a last day kind of gift.  

It's pretty simple - you just need a silly straw, package of Kool-aid, and a note for the student.  I get a good deal at the neighborhood Winco - 10 packages for $1.  Target had silly straws for $3 for a package of 12.  All in all it didn't hurt my teacher wallet as much as it could have.   


Yes, it's going to be a "Kool" and "Sweet" Summer!


4 more days to go!


Sincerely,


May 23, 2012

Paper Diorama


My dear wonderful coworker walked into my classroom the other day and announced this very simple, paper folding diorama.  In 12 years of teaching I have never seen this come together.  Now, I know this will be a yearly thing.


How to make a Paper Diorama - Now here's the steps:

 Step 1: Lay paper horizontal in front of you.
 Step 2: Fold down right corner to make a flat bottom.
 Step 3: Open it up and repeat on the left side.
 Step 4: Open it up and see the X - the top part of the X should be the small little folds (compared to the lower portion of the X).
 Step 5: Turn the paper so the little part is on the bottom.
 Step 6: Cut the left little fold just up to the intersection.
 Step 7: Gently pull the middle part of cut X to the left and have 
it overlap the paper until you get to the fold.  Tape, staple, or glue it into place.
Step 8: Flip it around so you have "mountains" in the background.


Here's an example of my student's Gold Mining Camp.  With their folds, it turned out to be tiny little mountains at the very top. 

Have fun paper folding!  I didn't get a headache from this project!

Sincerely,


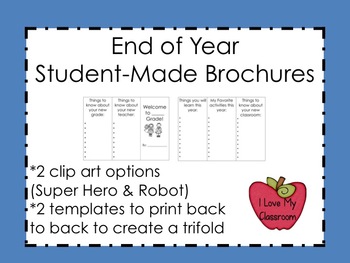
Welcome to 4th Grade Brochures (Student Made)


To wrap up the school year my students created brochures about 4th grade.  I made pretty simple directions for them to follow.  They had to do either one fold or two fold brochure.  We discussed different categories, and then they had to come up with 25 different facts about 4th grade.  I'm planning on separating them out and passing them onto the 3rd grade classes.  They loved being the "big kids" to help teach the younger students about how life is like.  Just an idea that might also come in handy at your end of school. 

Updated to add - that since this post I have created a freebie in my TPT store of a printable version of the brochure.  Hope this helps!  

End of Year Student Made Brochures (Freebie)

Sincerely,


May 21, 2012

Weaving with Students


In the Fall, my students learned about a specific Native American tribe that lived in California.  Two years ago I took extra yarn and taught them to weave.  Then, even though part of me thought I was crazy, I did it again this year.  It really is pretty simple once they get going.  The kids that "get it" then help the ones that are having a harder time.  Another reason I love 4th grade!


Now, I used a shoe box lid to have them weave.  My students brought in shoeboxes to make a Science Ecosystem diorama, so it was easy to just save the box lids for this project.


It was pretty easy to create the loom.  I had them use their scissors to make 7 cuts on the 2 ends of the shoebox lid.  This was hard for some of them since their shoe boxes were so thick.  Next year I will probably take their shoeboxes beforehand and use the paper cutter to complete the step quicker.


They then took an extra long (about 3 feet) piece of yarn and wrapped it around the first "tooth".  Yes, I likened creating the loom to flossing their teeth.  It was a silly comparison, but they understood.


After we wrapped it that first time, we tied it, then went down and up on the loom, "flossing" the shoebox teeth.  When it got to the last tooth they tied it.  


They then counted out 20 pieces of yarn (these pieces were about a foot long, 2 different colors), and they then started the "over, under" pattern.  I made them do one color, and then alternated with the other color.  I made them do at least 20 pieces, some did more and it turned into a small doll blanket.


When they were done, I had them move all the yarn to the center portion of the grid, and get it as tight as possible.  Then they tied the edges - taking the 2 colors and making a knot.  They went down the row, then did the other side.  


After those were done, we lifted it out of the shoebox lid, cut those strings shorter, and tied them together with their neighbor.  They were so proud of their accomplishments!  


I will be doing this again next Fall, and this time around I hope I won't think that I'm crazy!  


Sincerely,

May 19, 2012

My Bucket Filler Area


Have you read that book, Have you Filled a Bucket Today?  It's a good book.  I started reading it last year with my class, it's all about how words can help or hurt someone's feelings.  Basic stuff, but it gives the visual that our hearts are like buckets.  Fill them up and we feel good, saying mean stuff can hurt ourselves and others.  That we want to be a "Bucket Filler", not a "Bucket Dipper".

In my classroom this year I took it to a different level.  Last year we just did the book as a read aloud and discussed it.  This year we read the book, discussed it, and the kids each had their own "buckets". Yes, it is just 2 plastic shoe organizers put side by side, but that simple mail system had my students being kind to each other the entire year.  The entire year!  

The first week of school, after we read the book, I gave my students a colored index card.  They wrote their name and their class number.  Then I stuck the cards into the pockets and we were ready to get started.


It is a pretty easy set up.  In the yellow bucket I had index cards.  When the kids wanted to give a compliment, or thank someone for helping them or being kind, they just grabbed a card and wrote it down.  I made them include a To: __________ and From: __________ along with the message.  


After they were done writing, they placed it into my red bucket.  I went through the cards and made sure that they were all appropriate.  Some kids throughout the year tried to pull just writing a note to their buddies on it.  This wasn't note time, rather the cards had to stay with the purpose.  If they wrote a note, it wasn't delivered and I called the student over to make sure they understood the rules.  

The students do like to be delivers.  After I checked them at Friday lunch (I would collect all week), I would pass them off to my student helpers, who would deliver them into the right mailbox.  At the end of the day on Friday, when as a class we are passing out the work to take home, students could go over and grab out their compliment cards.  It was an amazing thing every week to see - kids that didn't think they had friends realized they do.  Kids that are shy, still could write a message, and someone else would initiate a friendship.  It helped my class to bond with each other.  I'm definitely going to continue this for future years.


Hope this helps someone!


May 17, 2012

Countdown to Summer! 10 Days to Go!


It's official, I'm starting to physically count the days until Summer break.  Today in class I pulled out the bright "summer" colors of copy paper and we made a 10 day paper memory chain.  


First I had to have them use their rulers to measure out the strips of paper, then we had to have a discussion as to why we needed to keep the papers together when they were cutting them. (The answer is because it saves time and energy - in case you were wondering).


Before we started we brainstormed all the fun things we have loved about our year.  My students brainstormed a huge list of stuff.  Here's some of their list that I actually remember:
  1. Cereal Box Book Reports
  2. Owl Pellet Dissection
  3. Food Can Dance
  4. Sugar Cube Missions
  5. Sacramento Field Trip
  6. Mission Report
  7. Famous Californian Presentations
  8. Winter Party
  9. Halloween Party
  10. Native Californian Research
  11. Who's Who Book Report
  12. Science Experiments
  13. Read Alouds
  14. etc, etc, etc...
After we went on and on writing it all on the board, they started their project.  It was the regular type of paper chain project, but it was really nice hearing them mention everything they have enjoyed about this year.  I'm really going to miss this group of kids...

...Anyhow, my paper chain is hanging up on the white board just waiting for tomorrow afternoon when we can tear a link off.  My students took theirs home, and hopefully they are sharing it with their families.  The countdown is on - 10 days left! 


Sincerely,

May 15, 2012

Sacramento - Field Trip Day!


My grade level headed to Sacramento today for our field trip.  It was a long day.  We left at 8:30 am and then promptly got into traffic.  What should have been a 1 1/2 hour drive turned into almost 2 1/2 hours.  I hope that the people involved in the car accident are okay though.  Our bus driver was a trooper.  She headed off the freeway onto side streets, and navigated the bus to our first stop, Sutter's Fort.  At Sutter's Fort it happened to be an exploration day.  There were other children that were going to spend the night there tonight.  They were living and breathing the 1850's.  We watched these other students make bread, churn butter, use tools to work with wood, and then we also got to experience all the details that Sutter's Fort holds.  Our visit was a short one, but there was a lot to see and do.  

After being inside Sutter's Fort we headed outside to the park and had lunch.  During lunch the noon cannon went off, which made all the children (and adults) jump.  After lunch we headed to the California History Museum.  Our reservations were at 12:30, and we only had an hour to cram in everything to see and do.  While last year's field trip had perfect timing, this year was rushed - mainly due to all the traffic.  I think next year we need to have at least 1 1/2 hours at the museum.  Just need to make a mental note about that.    

The California History Museum was an interesting place to visit.  There were some exhibits to see, and lots of information to walk through, but mainly the kids were more interested in the gift shop.  It was a chore to get everyone out of there in time to head back to school.  

Our busses had to park in front of the Capitol (the only space available to park), so we took the short walk down the street and ended up with a perfect class picture on the Capitol steps.  Of course I can't post it because of the students in the picture (hence a class picture), but just imagine a perfect blue sky, with a gorgeous Capitol building (like above), and then add faces of tired students sitting neatly in a row on the steps.

What a day!  I would like to thank Reserve America, the travel company that booked the trip for us.  They got us a deal!  I would also like to thank my colleagues, they kept the long drive bearable.  Because of the long drive, each of our classes had to have their own charter bus.  I have decided that I prefer charter busses over school busses any day.  Air conditioning, comfortable seats, and a DVD player to stick in a movie.  We watched Monsters Inc. on the way there, and Curious George on the way home.  Some kids took a nap on the way back, some just visited with their friends.  All in all, everyone should sleep good tonight.  

Hope you had a good day too!

Sincerely,


May 14, 2012

Field Trip Checklist


Tomorrow is the BIG field trip of the year.  It's full of fun, a trip to the Sutter's Fort and the California History Museum.  It's a time to reflect, learn, and bond outside of the 4 walls of the classroom.

I've been starting to fill my backpack for the trip tomorrow.  For 9 years I have used the same red backpack for every field trip.  It started back when I took that first 6th grade class to Science Camp, and since it has room for everything I might possibly need, I just keep using it.  

This wonderful backpack has 4 pockets (and some extra random ones).  Here's how I fill it up.

Big pocket (in the back):
*My lunch (I also pack an extra sandwich for the student that forgot theirs)
*Big trash bag to sit on during the picnic lunch
*A class treat for lunch time (usually a package of Oreos)
*Package of baby wipes
*Extra water
*Plastic bag and package of kleenex for nose bleeds (yes, they have happened on the bus)
*Grading to do on the bus
*DVD to watch on the bus ride (yes, we are fancy like that)
*sometimes a light weight jacket/sweater, sometimes an extra pair of shoes (if it's a wet field trip), possible towel

2nd big pocket:
*Emergency forms/Permission Slips
*Class List
*Extra google map directions (in case the bus driver doesn't really know where to go)
*Phone numbers for Museums
*Children's Asthma Inhalers/Medication
*Container of sunscreen

Smaller pocket:
*Camera
*Pencil/Pen
*Sunglasses
*Phone
*My inhaler
*Advil (for the almost constant of the field trip day head-ache)

Front mesh pocket:
*Hand Sanitizer
*Travel Bandaid Kit

It really isn't as heavy as it seems.  I'm also not carrying everything, as I give out folders to my parent chaperones to take materials with them.  

What's in the chaperone folders?
*Group list
*Activity pages (for students to complete at the museums)
*Pens/Pencils
*Name tags
*Schedule for the day

Aren't field trips fun?  I can say that now, since tomorrow night I will be too exhausted to do much of anything except sit and do absolutely nothing (at least I can dream of doing nothing.)

Happy Traveling!


May 13, 2012

Mission Mania (Pictures and Report Write Up)


In California, the Missions are a big deal.  It's a good portion of the curriculum of our state history.  When my family had an opportunity to visit this mission, we jumped at the chance.  Unfortunately we could not go inside the chapel due to a funeral that was in session.

San Luis Obispo de Tolosa
 Chapel
Courtyard 

 The original doors
The original bells
Beautiful courtyard
Hanging out with Father Serra

Sincerely,